As Unity has started to move a lot of their tools and extension into packages within the Package Manager. It would be great if we could host our own re-usable unity packages within it, Well you can!

Unity allows you to host your own collection of packages on our own server and have them show up in the package manager. (Note this is only possible from Unity 2018.3)
With Unity just using a standard npm package system to host their packages we just need to setup our own server and get Unity to lookup that server for packages at the same time, We can do this but editing the project manifest. With this then when unity pulls all the packages down it will also search for our packages.
To host these packages we are going to use Verdaccio a free and lightweight open source npm proxy registry. Where you host this is up to you, at Pocket Sized Hands We host this on a docker container on our internal server, as the process is almost identical I will just show setting this up on a Google Cloud Instance which we can host for free!
Creating VM instance
First we will create the free Google cloud VM instance for this we will create a f1-micro instance hosted in us-west1. This is part of the free tier Google offers (as of posting this article but check for any updates).
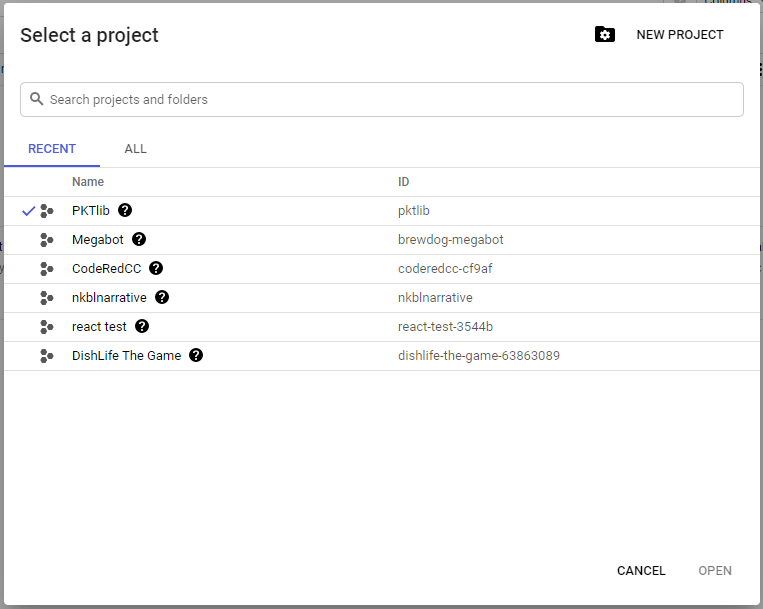
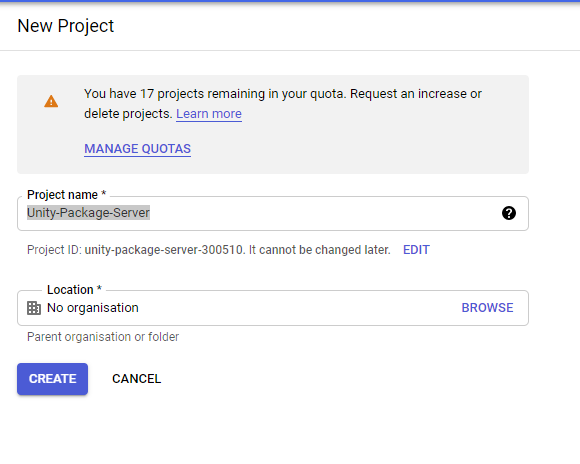
Go to Google Cloud Then either create a new project and give it a sensible name, I’m using Unity-Package-Server for this example or use a project you already have
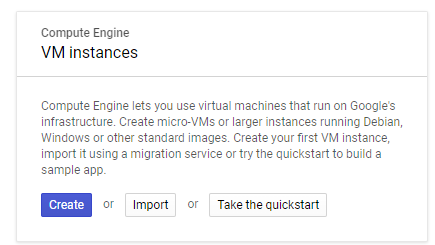
Once this has been created go to VM Instance Within Compute Engine.
Then click create a new instance
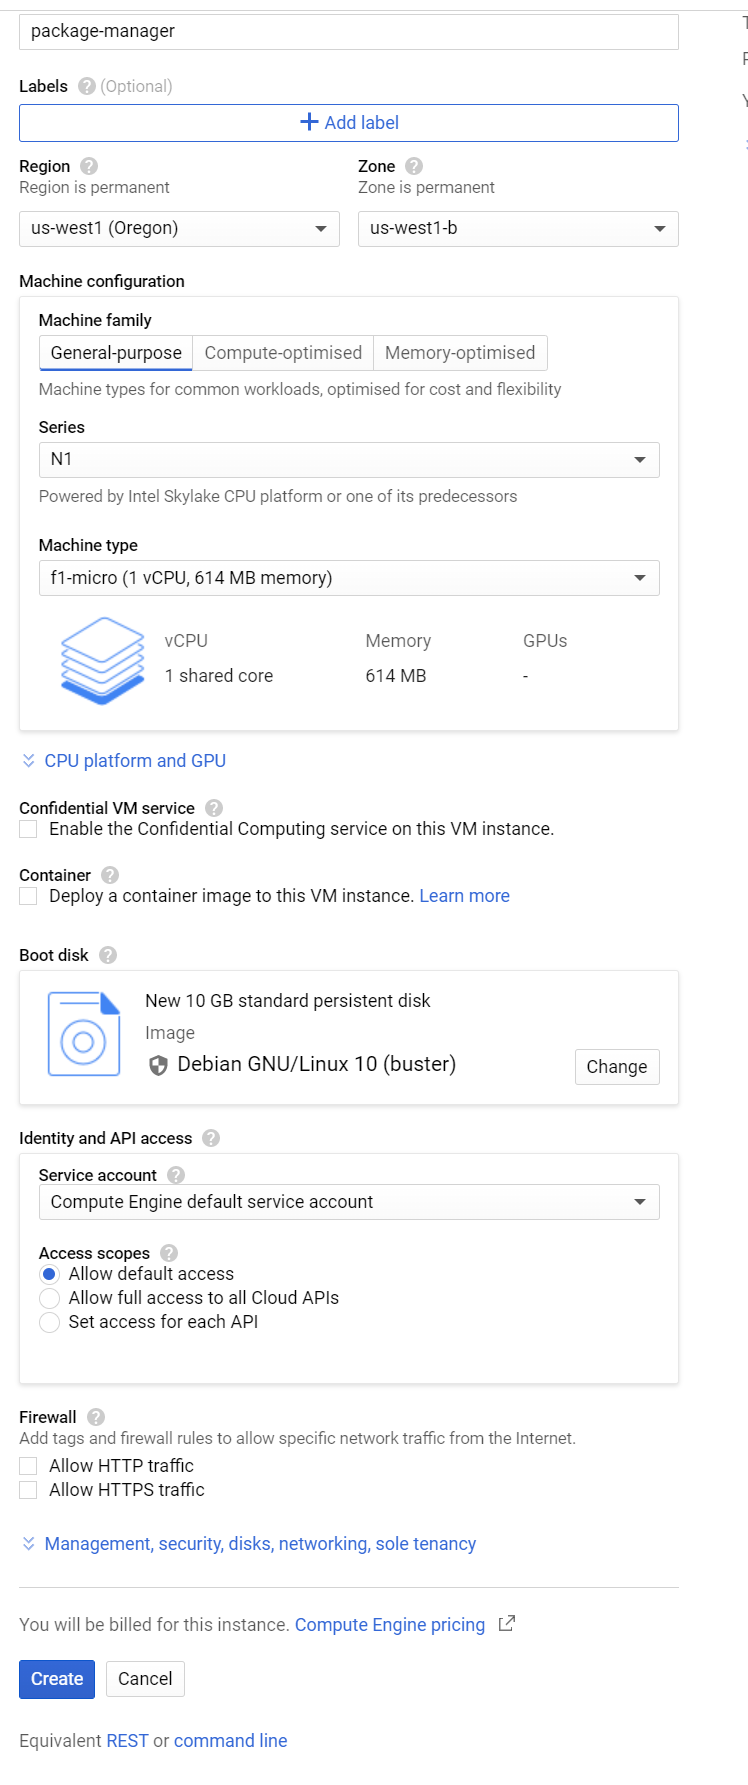
Here we want to make sure we are setting up the instance to be part of our free tier or you will be charged for this. So make sure to give it a name, set the region and set size to f1-micro. It will say there will be a monthly charge of $4~ but as long as you stay within the free limits and in us-west1 it will be free.
Next lets SSH into the instance by pressing the SSH button. This will open up a terminal window allowing for us you interact with server
Setting up Verdaccio
Now we are going to install Verdaccio onto the instance.
First lets make ourselves a root user
Enter
sudo passwd
and set a password you want the root user to be
next
su
Enter the password you just created and you should be the root user. You can check this with:
whoami
and it should print out root
Now lets download our dependencies. This will install NodeJS, npm and screen.
NodeJS and npm are for the hosting the packages and Screen allows us to keep the server running.
curl -sL https://deb.nodesource.com/setup_14.x | bash -
apt-get install -y nodejs
apt-get install screen
Now lets add Verdaccio from npm
npm install –global verdaccio
Once this is all installed we should exit the root user using the exit command, this is due to us only wanting to run Verdaccio as a normal user rather than the root.
Next lets start Verdaccio with the following command
verdaccio
Starting this will generate our configuration files which we need to edit first so lets stop verdaccio and edit it by pressing Ctrl+C.
cd verdaccio
nano config.yaml
This will open up the config file in nano (you can use vim if you prefer) and we are going to add a listen config which will tell verdaccio to listen to all calls to the 4873 port
listen:
- 0.0.0.0:4873
In nano enter the 2 lines in here
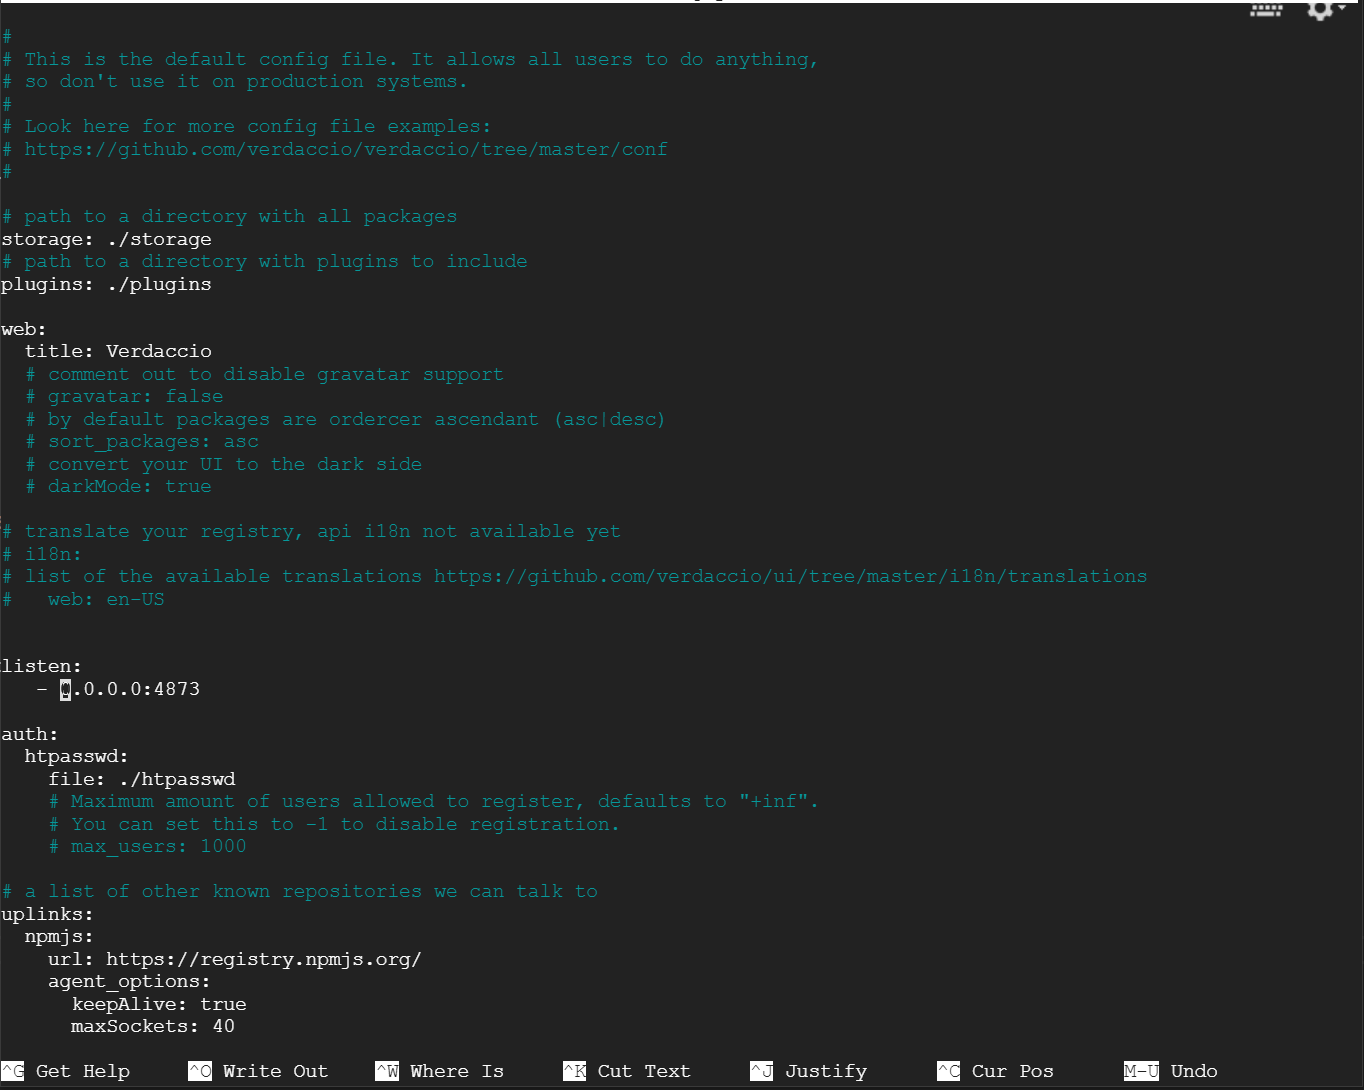
Add then press Ctrl+X and then Y to confirm the change then just hit Enter to save our changes
Now we need to make sure Verdaccio keeps running on the server even with the terminal is closed. For this we are going to use the tool screen that we install earlier.
Enter
screen
and then lets start the verdaccio process
verdaccio
This will keep our verdaccio running on a new virtual screen you should see something like this
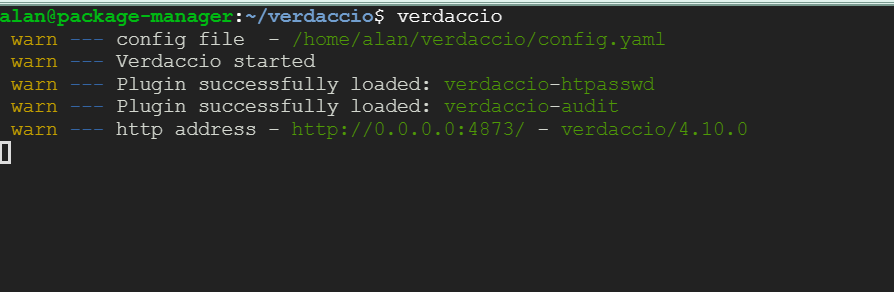
Now we can jump back to the main terminal press Ctrl+A then Ctrl+D
Setting up Firewall
Now that verdaccio is all running we can close our terminal and jump back to Google Cloud.
We need to setup a firewall setting to allow access to our server from the internet.
On Google Cloud go to VPC network -> Firewall
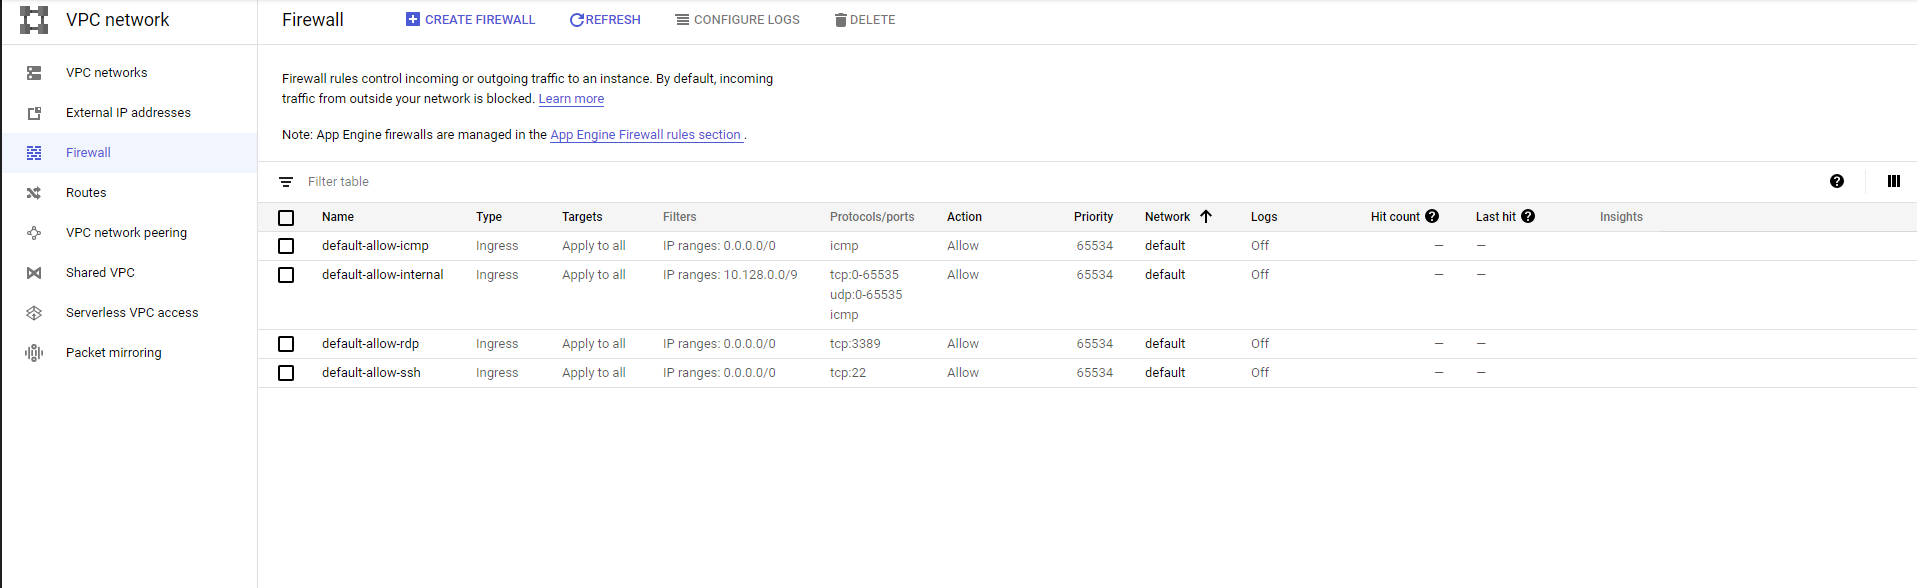
And press create firewall. Here we want to
Set Targets to All instance in the network - This means the rule will affect everything within our project
Set Source Filter to IP ranges - This means we can define who has access based on IP
Set Source IP ranges to 0.0.0.0/0 - This means that any ip access can access the instance, as if you use a VPN you can define this service to only be access by those IP here
Set the TPC Port to 4873 - This was the port we setup verdaccio to use earlier
And press create!
Now we should be able to access Verdaccio from the internet using our IP address which you can find under the External IP in VM instance
http://[Your external IP]:4873/
You may wish to setup a url redirect for this but that is outside the scope of this blog post.
This will also change if you restart the server unless you set this to a static IP which will cost money.
Creating Unity Packages
Now we have Verdaccio running we can now start to add our packages.
As I mentioned earlier unity is using a NPM standard for it’s packages which means that all the information about our package needs to be hosted in a package.json.
Within the root folder create the package.json and fill in all your package information. You can see what you can add within the unity documentation
Here’s an example though
As you can see you can setup the package to have dependencies on other packages you have created or within unity.
Your are also going to need to setup the packages folder structure as unity is expecting in
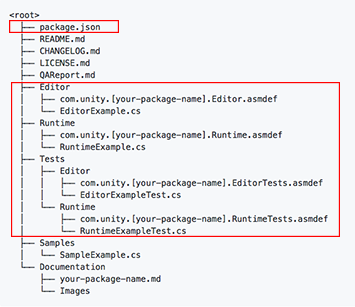
With Editor, Runtime and Test folders separated out and with there own Assembly Definition. This means that each package will be separated out into it’s own dll when the game is built.
We can also add in ReadMe.md and ChangeLog.md which will show up in verdaccio which can be very useful!
Uploading Packages
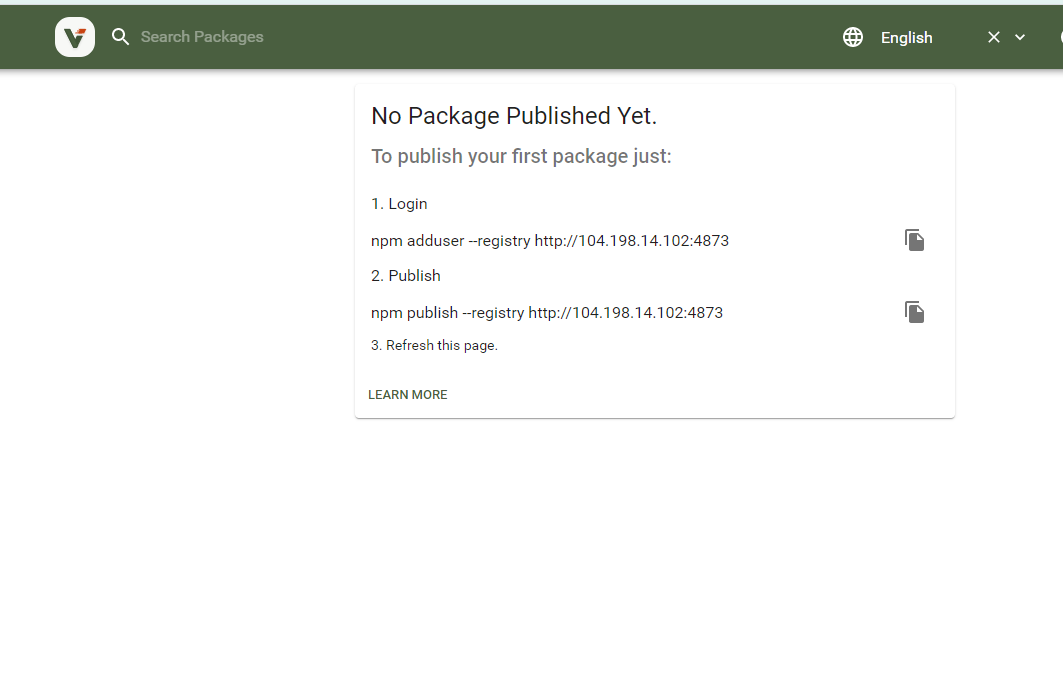
To update the package we are first going to need to create a user this is done on our local machine using PowerShell.
Open up powershell and enter
npm adduser –registry http://[Your external IP]:4873
and give your self a username, password and name. Once you are register you can now just use login in future
npm login –registry http://[Your external IP]:4873
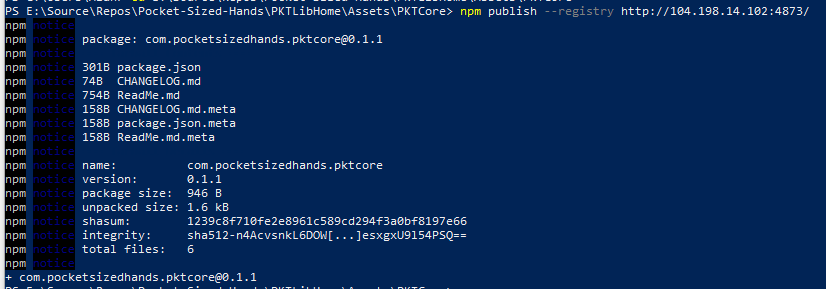
Now just open up powershell in the root folder of the package and call
npm publish –registry http://[Your external IP]:4873
This will push the package to Verdaccio
Now if we just back to our http://[Your external IP]:4873 on our browner we should see the new package we just created!
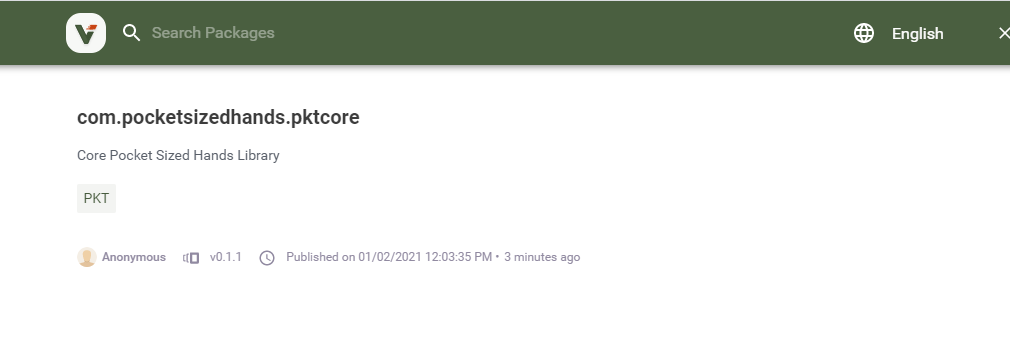
If you are wanting to update the package all you need to do is increase the version number within the Package.json and the call npm publish again and it will upload the newer version but still keep a history of the previous versions
Accessing your package from Unity Package Manger
So we have our packages all hosted on Verdaccio we now want to access within the package manger.
We simple need to add a scopedRegistries into the manifest.json within the Package folder for our project
This means that Unity will search http://[Your external IP]:4873/ for any packages that start with com.yourcompany.
So we just need to open unity back up and search for our package
From here we can install and keep the package updated.
That should be everything you need to run your own package manager server.
If any problems feel free to drop me a line on Twitter @Gamereat
As a not for security once you have created all the users who want to upload packages you should set the max-user to 0 in the verdaccio config See